Ansible / Tutorial
Run and schedule an Ansible playbook from a web UI
Take a small Ansible playbook from Git to a manual run and a recurring schedule in Stackweaver, with output you can check before using real infrastructure.
A playbook is easier to hand over when the next person can find its inputs and see what happened last time. I want someone else to be able to run the job and understand its result.
For a first run, keep the automation small. This example prints a message on the Ansible runner, then puts the same job behind a schedule. Your production servers can wait until you know which runner executes the job and where its output goes.
Techstack
- Stackweaver, with an available Ansible runner.
- A Git repository connected to your Stackweaver organization.
- An Ansible playbook and YAML inventory.
Use an existing installation or follow the Docker Compose guide. The Helm guide covers Kubernetes installations. You will also need a project where you can create playbooks, inventories and job templates.
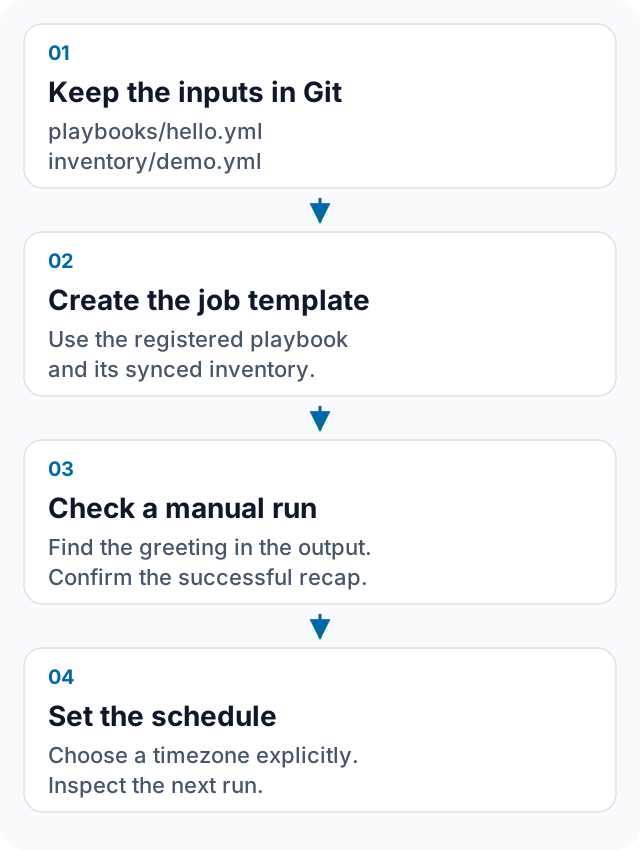
Put the example in Git
Add these two files to a repository you control and commit them to the branch you will use in Stackweaver.
The playbook goes in playbooks/hello.yml:
---
- name: First Stackweaver job
  hosts: demo
  connection: local
  gather_facts: false
  tasks:
    - name: Show the greeting
      ansible.builtin.debug:
        msg: Hello from Stackweaver
The inventory goes in inventory/demo.yml:
all:
  children:
    demo:
      hosts:
        localhost:
          ansible_connection: local
Here, localhost means the Ansible runner.
It does not mean your laptop or the machine where your browser is open.
The task needs no target SSH or cloud credential, but Stackweaver still needs access to the repository.
Register the files and check their sync
In Ansible > Playbooks, choose New Playbook.
Select your VCS connection, repository and committed branch, then set the path to playbooks/hello.yml.
Name the registration hello so it is easy to select later.
Use Cached snapshot for this example.
Save the playbook, sync it and check that the sync succeeded at the commit you intended.
Do the same in Ansible > Inventories using New Inventory.
Choose VCS and point it at inventory/demo.yml on the same branch.
Name this inventory demo.
After syncing, check that the inventory contains the demo group and its localhost host.
The point of this check is simple: a path entered in a form is not proof that the file was fetched. If a sync fails, resolve the repository access or path before launching the job. The first-job guide has the full setup path, and the playbook guide explains cached and fresh source modes.
Give the run a reusable name
Open Job Templates > New Job Template and name the template hello.
Choose the playbook and synced inventory you just registered.
Leave SSH credentials empty and privilege escalation disabled for this local debug task.
Save the template, open it and check its project and inputs. Choose Launch, then Launch Job after reviewing the launch dialog. You can leave limits, tags and extra variables empty for this example.
Wait for the job to finish.
A launch accepted by the API means a job was created; it does not mean the playbook succeeded.
Check the terminal result and inspect the task output for Hello from Stackweaver.
The recap should show one successful task on localhost, with no changed, failed or unreachable hosts.
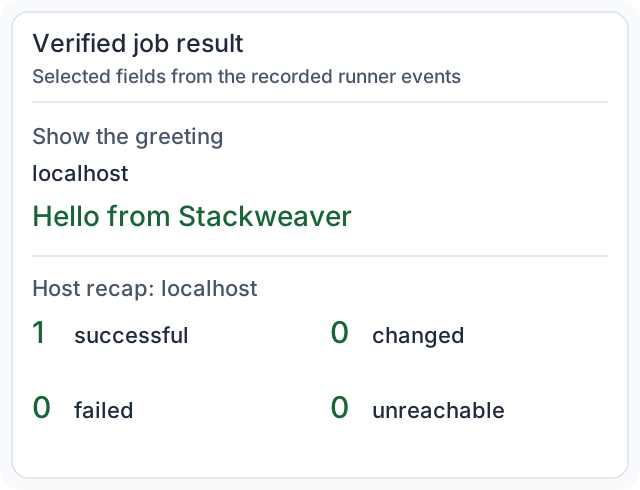
I want to see one successful manual run before I leave a schedule enabled.
If the job fails, keep working on that manual run. An empty inventory, a missing runner or a repository problem will not improve because the same job runs every morning. The execution guide explains the launch paths and job results.
Schedule the same job
Open Schedules and choose New Schedule.
Name the schedule hello-weekdays.
Select Job Template as the target and choose hello.
For weekday mornings, use this cron expression:
0 9 * * 1-5
Choose UTC explicitly. This means 09:00 UTC from Monday through Friday, not automatically 09:00 in your local timezone. For an organization using local office hours, choose a supported local timezone and check its next-run time, including daylight-saving changes.
Creating the schedule enables it. Check its target and next run after saving. Enabling a disabled schedule recalculates when it runs next; it does not launch the job immediately.
For this evaluation, use the schedule's actions menu to Disable it after checking the configuration, or delete it when you are finished. Keep recurring work enabled when you intend it to run and know who is responsible for it.
Move on to a useful job
You now have a small example whose repository files, execution result and schedule you can inspect. The next step is a playbook that does useful work in your environment. Use a runner that can reach those hosts and give the job the credentials it needs.
Keep the manual-run check when you make that change. It is a much easier place to investigate a failure than a recurring job someone else discovers the next morning.
For the broader product workflow, see Ansible automation in Stackweaver. If you are evaluating controllers, the Ansible Automation Platform comparison and Semaphore UI comparison cover the differences relevant to that choice.